|
In
This Section
Free Quilting Patterns Links
Quilting Book Reviews
Quilting Magazines
Recommended Quilting Sites
AllCrafts
Crafts
Sections
|
|
Our Other Free Purse Projects and Patterns
Over 100 Free Purse Sewing Patterns
Over 150 Free Purse Crochet Patterns
Over 400 Free Purse Knitting and Felting Patterns
|
How to Make a Book Purse

Here's a novel purse that is perfect for
the bibliophile in your life! Make this
purse out of an old (preferably cheap
and unloved) book. It's sure to be a conversation starter
wherever you take it and you'll get to recycle a discarded
book in the process.
Materials
- A large, old book that no one wants.
- Craft knife or utility knife
- Scissors
- Iron
- Sewing machine
- Hot glue or similar
- Fabric to match the book.
- Pen or pencil
- Straightedge (optional)
Directions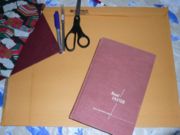
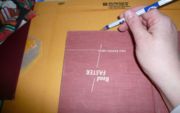
- Obtain a largish hardcover book. Used book stores,
library book sales, and thrift stores are good places
to find a tome that will suit this purpose.
- Look for something with an attractive cover in a color that suits your (or your recipient's) style. Some old books are bound with leather (or a lookalike) and embossed.
- Look around for textbooks, mismatched/outdated encyclopedias, Reader's Digest Condensed Books or anything that you think will be worth more for its cover than its contents.
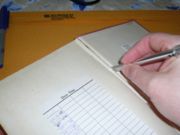
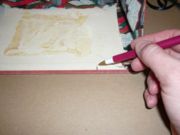
- Cut the pages away from the cover. You can use scissors or a craft knife. Open the cover and cut along the gutter (crease) line.
- Trace the book cover onto some firm pressed cardboard. Heavy mailing envelopes work fine.

- Cut your tracing out. Cut slightly INSIDE your tracing lines so that you get a cardboard rectangle that is just slightly smaller than your book cover(s).
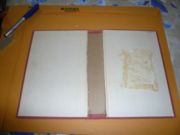
- Cut the spine section away.
- Check to see that the cardboard cutouts fit the covers of the book, and that their edges fit slightly INSIDE the edges of the book covers.
 - Cut a piece of pressed cardboard slightly smaller than the size of the book spine. This will support and reinforce the bottom of your new purse.
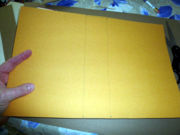
- Launder your fabric.
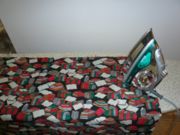 Iron the fabric smooth. You may starch the fabric to make it stiffer and easier to use if you like. Iron the fabric smooth. You may starch the fabric to make it stiffer and easier to use if you like.
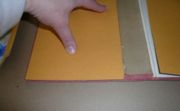
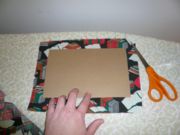 Use your cardboard rectangles as a template to cut your cloth. Lay the cardboard on the cloth and cut around it, leaving an inch or so in every direction. Use your cardboard rectangles as a template to cut your cloth. Lay the cardboard on the cloth and cut around it, leaving an inch or so in every direction.
 - Repeat for the spine cardboard piece.
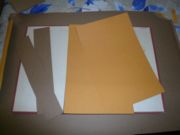
- Cut the ends of your purse.
 Fold a quarter yard (23cm) of fabric into quarters (fold once along a vertical centered fold line, then once along a horizontal fold line). You should end up with a rectangular shape, with folds on two adjacent edges and four layers of material. Fold a quarter yard (23cm) of fabric into quarters (fold once along a vertical centered fold line, then once along a horizontal fold line). You should end up with a rectangular shape, with folds on two adjacent edges and four layers of material.
- Measure and mark the following:
- One spine width from the corner where the two folded edges meet, along the edge with two folds. This measurement is shown by the red line in the previous diagram.
- One book cover width from the corner where the folded edges meet, down either of the longest sides. This measurement is shown by the blue line in the previous diagram.
- A diagonal line from the end of the first measurement to the end of the second measurement.
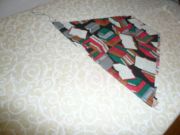
 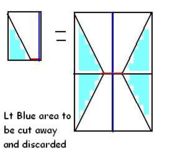 - Cut the triangles from the markings you made.
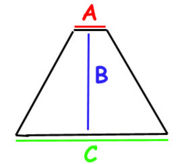
- You should now have two triangles that measure as follows:
A = twice the spine width B = the length of the short side
(width) of the book cover C = the distance that you want
your book purse to open up
- Repeat the process to make two more triangles with these dimensions, making for a total of four triangles.
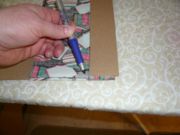
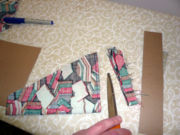
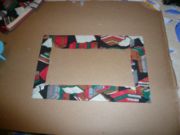
 - Trim the top of the fabric to one quarter inch (or so) longer than the width of the cover. (see photo for pointers)
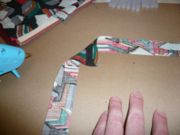
  - Sew the long sides of each pair of triangles. Right sides together.
- Turn and press the seam.
- Topstitch.
- Fold the bottom, narrow edge of your triangle in half to form a dart at the bottom.
- By hand or by machine, begin your stitch slightly less than halfway from fold to edge. Stitch up the fold at least an inch. This will help your purse to close cleanly without the fabric bunching outward.
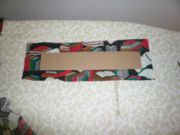
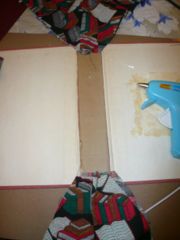
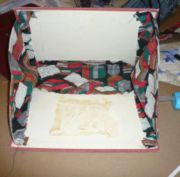
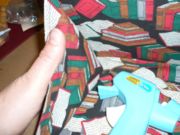
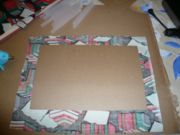   - Cover the two large cardboard rectangles with fabric, gluing the edges to the back side. You may glue the fabric to the front side if you wish as well.
 - Place the narrow, darted edge of the triangle(s) onto the inside, spine ends of the book cover. Be certain that the dart lies to the inside of the cover. Glue into place.
- Lay one of the thin strips of cardboard on the back side of its fabric.
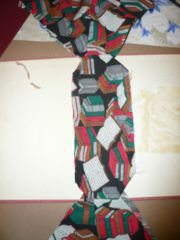 - Wrap the short ends of the fabric over the short ends of the spine cover. Glue into place.
 - Glue the long, raw edges of the triangles to the top and bottom edges of the book cover to form the sides of your purse.
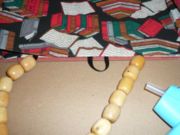
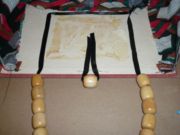 - Make two loops of bias tape, one to hold the button/bead closure and one for the button to slide through.
- Place the bias tape loops in the center of the openings and glue them carefully to the edges.
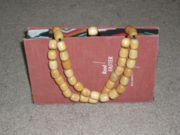
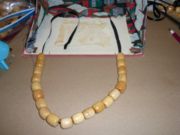 - String beads on the bias tape or similar for your handle.
 - Measure carefully and glue them into place.
  - Glue your covered rectangles to the inside of each book cover, covering all raw edges.
 - Press bottom corners to the inside of purse and glue them into place.
 - Your new purse is ready to dazzle and amaze!
Tips
- Hot glue works well because of its minimal drying time. You can use craft glue, but you will need to clamp each section into place and allow it to dry before proceeding to the next step.
Warnings
- Take care when handling scissors, craft knives and hot glue guns.
- It is possible that the bibliophile in your life would be offended at a notion of repurposing a book rather than reading it. At the least, choose an old volume with no particular value.
Article provided by wikiHow, a collaborative writing project to build the world's largest, highest quality how-to manual. Please edit this article and find author credits at the original wikiHow article on How to Make a Book Purse. All content on wikiHow can be shared under a Creative Commons license.
|
|
|
| |
|
|
Freebies
|